How to Pack a Perfect Cone Without a Filler Tool
Packing preroll cones without a filler tool is a skill worth learning. No machines, no gadgets, just you, your materials, and a solid cone. Once you get the technique down, you’ll realize it’s not about fancy gear. It’s about good paper and consistent packing. If you’re working with Zig-Zag preroll cones, you're already halfway there.
In this guide, we’re showing you how to pack a perfect cone using just what’s around you. We’ve got the step-by-step method, troubleshooting tips, and everything you need to know to get the job done right.
Why Pre-Rolled Cones Are the Rolling Revolution
Pre-rolled cones changed the game for anyone who prefers to skip the hassle of rolling from scratch. They save time, reduce mess, and make consistency easy, even if you've got zero rolling skills.
We’ve seen a shift. More and more people are reaching for preroll cones because they remove the pressure of getting that perfect roll every time. With pre-formed cones like ours, all you need to do is fill and pack.
Here’s why preroll cones are the go-to for anyone who wants less mess and more ease:
-
No rolling skills needed: Perfect for beginners or anyone who’s all thumbs.
-
Built-in tips: Most cones come pre-fitted with a crutch, so you're not scrambling for one.
-
Uniform shape: You get the same shape every time, making it easier to pack evenly.
-
Time-saver: Skip the setup and get straight to the part that matters: packing.
And if you’re rolling in bulk or prepping for a weekend with friends, our bulk cones collection is a solid move. We even have the Mini Bulk Cones (1 1/4) if you like to keep things light
What You’ll Need (No Filler Tool Required)

We get it, not everyone has a filler tool lying around. But that shouldn’t stop you from packing your cones right. When you’re using quality prerolled cones like ours, a little resourcefulness goes a long way. The key is using basic tools that help guide your material and compress it evenly.
Here’s a quick list of what we recommend:
-
Pen, straw, or chopstick: These are perfect for lightly packing down each layer. You want something slim, sturdy, and easy to handle. Just make sure it’s clean.
-
Flat surface: A table or counter works best. It keeps things steady while you pack and helps avoid spills.
-
Grinder (optional): Not required, but helpful if you want an even grind. Consistent texture makes it easier to pack your cone evenly without clumps.
-
Tray or paper plate: Use this to catch anything that spills while you’re filling. Trust us, it saves cleanup time and keeps your setup organized.
-
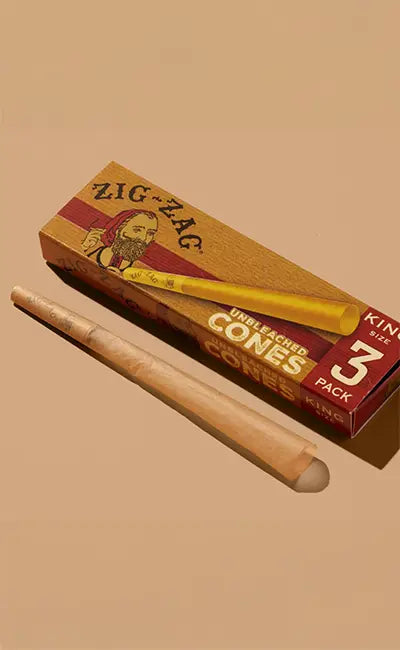
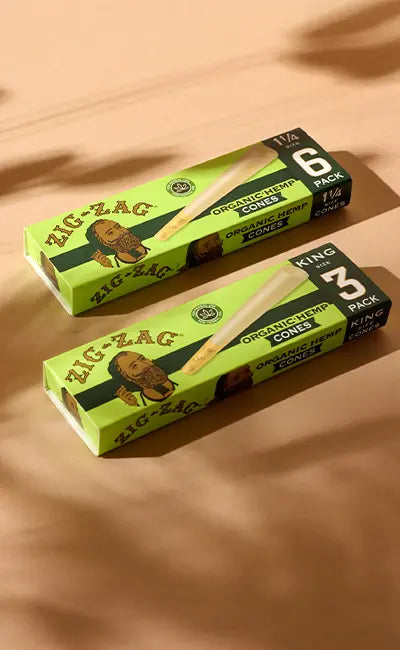
Zig-Zag preroll cones: Go with our 1 1/4 6-pack cones for everyday use or keep it fresh with a pack of rose cones when you want to switch it up. We also offer bulk cone packs for those who like to prep ahead.
-
Kutcorners papers (optional): If you're going semi-DIY, our classic Kutcorners give you a bit more control during the fill-and-fold step.
Step-by-Step: How to Pack Prerolled Cones by Hand

Now it’s time to get into the actual process. If you’re using one of our Zig-Zag hemp cones, you’re already working with a solid base. Here's how to get it packed just right:
Step 1: Hold the cone open gently
Keep your cone upright on a flat surface. Use one hand to steady the tip and the other to slightly open the top. This makes it easier to drop in your material without crushing the shape.
Step 2: Add ground material slowly
Drop in a small pinch at a time. Don’t rush it. Add little by little so each layer can settle without creating air pockets. A grinder helps make the texture more even, but it’s not a must.
Step 3: Pack as you go
Grab your pen, straw, or chopsticks and lightly press down each layer before adding more. No need to push too hard, just enough to shape it. This helps maintain a smooth flow and even structure.
Step 4: Leave room to twist and seal
Stop adding material about half an inch from the top. You’ll need space to twist it shut. Overfilling makes it hard to close and messes with airflow.
Step 5: Tap the filter end
Hold the cone upright and gently tap the filter side on a hard surface. This settles everything and helps prevent gaps or uneven burning.
Tips to Avoid Common Packing Problems
We want to keep your cones burning smoothly. Here are a few extra things to watch for:
-
Don’t overpack. Too much material leads to airflow issues and makes the cone hard to handle.
-
Avoid pressing too hard. You want a snug pack, not a brick.
-
Watch for moisture. If the material is sticky or too wet, it can tear the cone or ruin the shape.
Once you’ve packed a few by hand, you’ll get a feel for the right pressure and amount. You’ll notice how the paper holds up without ripping or sagging mid-pack. It’s all about balance: steady hands, a bit of patience, and good cones.
Common Packing Mistakes (And How to Avoid Them)
When you’re packing preroll cones by hand, there’s a learning curve. But once you know what to watch for, it’s easy to catch and correct minor issues before they turn into a frustrating session. We’re breaking down the most common problems we’ve seen over the years and what we do to solve them.
Overstuffing
Too much material creates blockage, ruins the airflow, and makes it harder to twist the top.
Fix it: If the cone starts to bulge or becomes hard to tap down, take a bit out. Don’t force it. Leave a little breathing room near the top so it seals properly. Our cones are roomy, but there’s still a limit.
Loose packing
If your cone burns too fast or flakes apart, it’s probably under-packed.
Fix it: Add material slowly and use your pen or straw to lightly press each layer before adding more. The goal is a steady, even fill. Not too tight, not too soft.
Uneven compression
If one side is firmer than the other, the cone can burn unevenly or “canoe”, which wastes your material.
Fix it: Use the packing tool to press straight down, not at an angle. Rotate the cone as you go to keep the shape consistent. We like to tap the filter side on the table every few layers to keep things centered.
Sticky or damp material
Moisture weakens the cone structure and makes packing messy.
Fix it: Let your material dry out a little before packing. If it feels damp or clumpy, spread it out on a tray for a few minutes. Our rolling papers hold up well, but even the best paper won’t survive soggy contents.
Torn paper from aggressive tools
Sometimes people get carried away and jam down too hard or use something sharp.
Fix it: Only use smooth, rounded tools like pens or clean chopsticks. Don’t poke, press gently. If the cone tears, grab a new one and go easier next time.
Why Paper Quality Still Matters

We’ve been making rolling papers for over 140 years, and one thing we’ve learned is this: not all cones are created equal. You can have the perfect pack and the right tools, but you still end up with a cone that burns weirdly or falls apart. That’s why we focus on how our cones are made, because great paper keeps everything together.
Here’s why we never overlook paper quality, and why you shouldn’t either:
-
Durable build means less tearing: Our cones don’t buckle under pressure. They hold their shape while you pack, with no collapsing or crumbling.
-
Smooth, even texture helps pack consistency: The texture of the paper plays a big role in how evenly your material settles. With smoother paper, it’s easier to layer and tamp as you go. That means fewer air pockets and better airflow.
-
Slow-burning material keeps things steady: A fast burn wastes your fill. We built our cones with a slow-burn in mind. They keep the pace steady and give you control, especially helpful if you’re still getting the hang of hand-packing.
-
Pre-formed shape and crutch for easy handling: Our cones come ready with a tip that keeps everything in place. That base support means less fumbling while you fill, especially if you’re working without a funnel or tool.
-
Clean edge for a better finish: When it’s time to twist the top, the edge needs to hold. Loose or uneven paper makes it harder to close off the top. Our cones are cut and shaped to stay firm, so you don’t end up with spills or unraveling.
We keep the same standard across all styles. Because in our experience, paper quality is one of the few things you can’t afford to compromise on. It keeps your hand-packing sessions easy and your results clean.
You’ve Got This: Master the Art of Hand-Packing Preroll Cones
You don’t need machines or special gadgets to pack like a pro. We’ve kept things simple and clear so you can follow along without overthinking it. From choosing the right tools to avoiding the most common mistakes, every part of the process comes down to control and consistency, and that’s something you can build with each pack.
Here’s the bottom line:
-
You can pack perfect preroll cones without a filler tool.
-
You can use everyday items to get the job done.
-
You can trust our paper to support a solid, even burn every time.
So the next time you're packing by hand, remember: we’ve got your back with quality cones and simple tips that work. Keep it clean, keep it easy, and let the cones do their thing.
We like to rest our cone in a small glass, shot glass, or even inside the cardboard tube that comes with some of our 6-pack cones. It keeps the base steady while we add material, especially if we're using both hands to pack and compress. Stability helps prevent spills and lets the material settle naturally. If you’re packing several cones at once, using a tray helps contain everything.
If you find it hard to press down or if the cone starts to bulge or lose shape, you're probably adding too much. You should also be able to twist the top without tearing the paper. Overpacking also makes airflow difficult, which can affect how the cone burns.
Yes, use the tip of your finger to gently push material down in layers, but be careful not to crush or tear the cone. Fingers aren’t as precise as a straw or pen, so take your time. For better control, we still recommend a small tool like a chopstick or a dull pencil.
Tight enough to stay together, but not so firm that airflow is blocked. We go layer by layer, adding small amounts and gently pressing each one. You’ll want to stop when it feels firm but not stiff. If the cone feels too dense or has trouble burning evenly, ease up on compression next time.
If it’s still intact and not too crumpled, gently tap out the material and start again. If the paper is torn or misshapen, it’s better to grab a fresh one. Reusing only works if the structure holds up.
It’s not required, but we always prefer to use one. Grinding helps us get an even texture that packs smoother and burns better. If you’re hand-breaking material, just try to keep pieces small and consistent in size. Avoid clumps; they can throw off the airflow or create uneven layers.
We always work over a tray or paper plate to catch anything loose. You can also cup your hand around the base of the cone while adding material to guide it in. Using a scoop or a small folded card helps keep things tidy. It’s all about staying organized from start to finish.
This usually comes from uneven compression. Tapping the filter end on a table mid-pack also helps settle the material. If the problem continues, try switching to a sturdier option for more structure.
Once we’ve filled the cone, we pinch the top just above the material and twist gently until it seals. Don’t overfill the paper; it needs a little space to twist without tearing. For an even finish, you can lightly roll the edge between your fingers before sealing. A clean twist helps keep everything tight and ready to go.

