Rolling one-handed shows confidence, control, and skill. It’s also a great way to stand out when you’re hanging with friends or getting creative with your setup.
At Zig-Zag, we’ve seen how rolling goes beyond the basics. For over 140 years, we’ve been part of the culture, helping people express themselves through technique and tradition. Rolling with one hand taps into that history. In this guide, we’ll show you how to master the one-handed roll and make it your own.
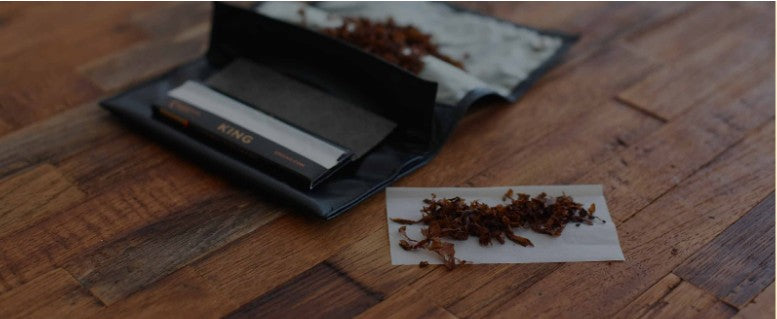
What You Need to Roll Like a Pro

To roll one-handed, you’ll need a rolling paper, a flat surface, clean hands, and the right mindset. The tools may be simple, but your intention is everything. Zig-Zag has always been about doing it your way, and that starts with getting your setup right.
Rolling one-handed is about stripping things back to the essentials. That’s the spirit of Zig-Zag. For over a century, we’ve seen how a few simple materials can inspire a rolling style that’s all your own. Here’s what we recommend having on hand:
Your Preferred Zig-Zag Rolling Paper
Start with the paper that fits your style. Our Original Papers are a classic that has stood the test of time. Each option supports a different rolling technique, so feel free to experiment and find your favorite
Zig-Zag papers are all about consistency and feel. You’ll get the kind of texture that makes one-handed rolling easier, especially when you’re working with one thumb and a few well-trained fingers.
Quality Herbs or Legal Blends
No matter your blend of choice, always work with a dry, evenly ground product. You don’t need large amounts. In fact, rolling one-handed works best when you keep things moderate and manageable.
Filters or Tips
These are optional, but they can help give your roll more shape and structure, especially useful when using one hand. Pre-rolled tips or folded paper filters are great to keep handy. They act as a stabilizer during the roll and make the final result look cleaner. If you’re going for a more structured finish, filters are a smart addition.
Flat Surface and Clean Hands
Always roll on a surface that’s dry and steady. It doesn’t have to be fancy, just clear enough to give you room to move. Coffee tables, desks, or rolling trays all work.
Clean hands matter more than you think. One-handed rolling means everything relies on touch and grip. Dirt or moisture can throw off the paper or make things stick too much. Wash your hands, dry them well, and you’re ready to go.
Optional Tools for Extra Support

If you want to simplify the prep, here are a few tools that won’t get in your way:
-
A grinder to get an even texture
-
A rolling tray to catch any spills
-
A paper pack or card for shaping (only if needed)
That said, we believe in keeping it classic. The one-handed roll is all about skill and control. Once you master the basics, those extras will just be there to support, not take over.
How Do You Roll One-Handed? (Step-by-Step)
Rolling with one hand is about using what you’ve got, your thumb and fingers, to shape, fill, and finish without losing control. Our best-selling products are flexible enough to make this method easier for all skill levels. Here’s how to do it in five easy steps.
1. Prep Your Paper and Tip
Start with your preferred Zig-Zag paper and tip. If you’re using a filter or pre-roll tip, place it at one end of the paper before you begin. Hold the paper with the gum side facing you, so it’s ready for sealing once you finish the roll.
You can shape the paper slightly by pre-creasing it along the middle. This helps form a channel that makes loading easier. It also keeps the material from sliding around when you start shaping the roll.
2. Load and Shape the Material with One Hand
Pick up a small amount of your blend using the same hand that’s holding the paper. Let the paper rest lightly between your thumb and middle finger while you use your index finger to gently push the material into place.
Use small motions and don’t overload the paper. Keep your grip steady but light so you can still shape as you go.
3. Tuck with Your Fingers and Thumb
Once the blend is loaded, use your thumb to press and your fingers to curl the paper over the material. This is the trickiest part of one-handed rolling, but it gets easier with repetition. The goal is to tuck the edge of the paper under the material without letting anything spill out.
If you’re using Zig-Zag King Size Cones, the extra length gives you more room to shape and seal at your own pace.
4. Roll Up and Tighten
After the tuck, begin rolling the paper upward between your thumb and finger. Keep it slow and even. Your thumb does most of the pushing, while your fingers guide the movement.
The tighter the roll, the cleaner the finish. Practice makes a huge difference here, so don’t stress if your first few attempts come out a little loose.
5. Seal It with Confidence
Now it’s time to finish the job. Lick the adhesive side and seal the roll by pressing down with your thumb. Run it across the length of the paper in a smooth, steady motion to make sure it sticks.
Give the roll a gentle tap on the table to pack it slightly, then twist the open end if needed. That’s it, you’ve rolled one-handed.
Why Does One-Handed Rolling Matter?

Rolling one-handed goes beyond convenience; it’s a personal expression of confidence and control. It reflects a creative mindset and a sense of pride in how you roll. For many, this technique is a way to show skill and style without overthinking it.
There’s a reason Zig-Zag papers have been a staple for generations. We’ve always been about more than function. Our papers are part of a culture that values precision, craft, and identity. And that includes how you roll them, especially when you’re doing it with one hand.
Rolling Is a Form of Self-Expression
You can tell a lot about someone by how they roll. It’s the same way some people wear their favorite sneakers or rep their favorite band tee. It’s personal. Rolling with one hand adds another layer to the fact that it says you know what you’re doing, and you’re not afraid to do it your way.
It's About Control, Not Just Technique
One-handed rolling teaches you to stay steady and focused. You control the shape, the seal, and the outcome with limited movement. That level of control turns rolling into a skill, not just a habit.
This isn’t about shortcuts, it’s about refining the process until it becomes second nature. Just like artists use specific tools and movements, one-handed rolling has its own rhythm.
Culture Carries Through the Paper
For over 140 years, Zig-Zag has been part of the rolling scene, from counterculture to creativity. The people who use our papers aren’t just rolling; they’re connecting to a deeper history of craft and self-made style.
The one-handed roll fits into that culture. It’s a nod to skill, a wink to tradition, and a celebration of doing things your way.
It’s Also Just Fun
Let’s not overcomplicate it. Rolling this way feels good. Once you get the hang of it, you’ll want to do it again. It becomes part of your personal routine and adds some variety to how you prep.
Rolling one-handed shows personality. It also keeps things interesting and adds something extra to your everyday ritual.
How Can You Improve Your One-Handed Rolling Skills?
You can level up your one-handed rolling by trying different paper types, practicing new methods, and adjusting to your surroundings. It’s not about being perfect, it’s about growing your confidence and finding a rolling style that fits you.
Once you’ve nailed the basics, it’s time to add your own touch. With Zig-Zag, there are so many ways to build on your rolling technique. That’s the fun part. You can experiment with papers, switch up how you roll, and even change your method depending on the setting. Here’s how to keep progressing:
Try Different Zig-Zag Paper Styles

Each paper type adds something different to your one-handed roll. Some give you more grip. Others give you more space. If you haven’t already, try mixing up your go-to paper with these options:
-
King Size Cones: Great if you want more room to shape and pack with one hand.
-
Ultra Thin Papers: Easier to seal with light pressure and ideal for smoother rolls.
-
Hemp Papers: Made from natural fibers, these feel soft in hand and offer good control.
-
Original Papers: Timeless and dependable, perfect for practicing your tucks and seals.
Don’t stick to just one style. Try them all and see what works best for your one-handed method. You’ll start to notice the small differences that make a big impact.
Practice Alternative Rolling Methods
Once you’re comfortable, test out a few other rolling styles. For example:
-
Rolling with your dominant hand only vs. your non-dominant hand
-
Starting the tuck from the opposite side
-
Rolling standing up vs. sitting down
-
Using a surface vs. using just your hand
Every method teaches you something new about control and consistency. You might even develop your own signature move.
Adjust Based on Setting
Rolling isn’t always done in the same place or mood. Sometimes you’re rolling at home. Other times, you’re outdoors or prepping for a group hangout. Adapt how you roll based on where you are:
-
Solo Session? Take your time and go with the paper that lets you focus on precision.
-
Group Setting? Use larger papers or pre-rolled cones for quicker prep.
-
Traveling? Go for papers that hold their shape well in a pinch.
Being able to adjust is a sign of skill, and makes you more confident in any environment.
Keep It Clean and Consistent
As you get more advanced, small details make a big difference. Make sure your hands are dry and your paper is crease-free. Load your blend evenly. Seal with light but steady pressure.
Rolling one-handed is a craft. Like any skill, it sharpens with time. And with Zig-Zag, you’ve got the tools to keep improving at every step.
Roll Your Way with Confidence
Rolling with one hand isn’t just about learning a cool skill. It’s about owning your style, understanding your tools, and rolling with confidence wherever you are. With Zig-Zag, you're backed by over 140 years of experience in making papers that support creativity and control.
You’ve seen how one-handed rolling starts with the basics. From choosing the right paper to perfecting your roll through practice, the journey is all yours. And as you keep refining your method, you'll build a personal routine that feels effortless and natural.
At Zig-Zag, we’ve always believed that how you roll matters. That’s why our lineup of papers is made to fit different styles, settings, and preferences. You don’t need anything overcomplicated. You just need papers that work with you.
Share:
The Rap Lyrics That Immortalized Zig-Zag: A Legacy Written in Bars
How to Pack a Perfect Cone Without a Filler Tool