For beginners, mastering the art of rolling can seem daunting, but it's an essential skill for many smokers. Steps to roll a joint involve skillfully wrapping and sealing smoking material in paper to create a smooth, even burn. This guide is designed to break down the process into simple, manageable steps. Learning the basics of rolling is not just about technique; it's also about understanding the materials and their properties, which can significantly impact the final product.
Step-by-Step Guide to Basic Rolling Techniques
Preparing Your Rolling Materials
Preparing your rolling materials thoroughly is crucial for creating a smooth and enjoyable smoking experience. The first step is to ensure that your smoking substance is finely ground. A consistently fine grind promotes an even burn, preventing any side from burning faster than the other, which can cause running or canoeing. A standard grinder with sharp teeth should do the job effectively, ensuring all parts are broken down to a similar size. Once ground, set your material aside on a clean tray or paper to avoid any waste or spillage. Choose your
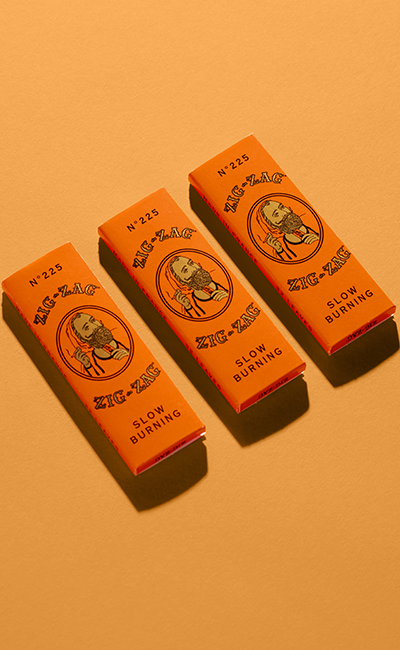
rolling papers carefully based on your preference for size and material. Additionally, incorporating a filter or crutch at one end of your roll can significantly enhance your smoking experience. Filters can prevent smaller particles from entering your mouth and ensure stability and shape retention of the roll. For rolling, utilize a clean, flat surface which will help in evenly distributing your material and rolling it tightly.
The Fundamentals of Hand Rolling
Mastering the art of hand rolling is a valuable skill for many smokers, offering a sense of accomplishment and a personalized smoking experience. It's a process that can be refined over time with practice and patience. Here's a step-by-step guide to help you get started with the basics of hand rolling:
-
Place the Paper: Begin by laying your rolling paper on a flat surface. Ensure the adhesive side is facing upwards and towards you. This orientation is crucial for a successful roll, as it allows for easy sealing later in the process. Take care to smooth out any creases or wrinkles in the paper to prepare a perfect bed for the contents. The positioning of the paper plays a vital role in how easily you can handle it during the later stages of the roll.
-
Add the Filter: If you choose to use a filter, place it at one end of the paper. This step is optional but recommended, as a filter can provide a more stable structure for your roll and enhance the smoking experience by filtering out larger particulates. Filters can be made from various materials, including thin cardboard or commercial filter tips. The placement of the filter not only contributes to smoother smoke but also helps in maintaining the structural integrity of the roll.
-
Fill with Smoking Material: Evenly distribute your ground substance along the length of the paper. It’s important to spread it consistently to avoid lumps or uneven burning. The amount of material used will depend on your preference and the size of the paper. A uniform distribution ensures that the roll burns evenly and prevents any side burning or waste of material. This step might take a bit of practice to perfect, especially in getting the right amount of substance that suits your smoking style.
-
Shape and Roll: Pinch the paper between your fingertips and roll it back and forth. This action shapes the contents into a cylindrical form. Proper shaping is key to a smooth and even roll. This step is where your dexterity and feeling for the roll become important. The better you become at shaping, the smoother the smoking experience will be. It’s also the step where you can adjust for any irregularities in the distribution of the substance.
-
Tuck and Roll: Gently tuck the non-adhesive side of the paper around the filling, then roll it towards the adhesive edge. This step requires finesse to ensure the roll is tight enough to hold its shape but not too tight that it restricts airflow. The tucking technique is crucial for securing the contents and achieving a seamless closure. A well-tucked roll ensures that the contents stay in place and the paper burns evenly from end to end.
-
Pack and Twist: Use a poker or a similar tool to pack the end opposite the filter, ensuring an even burn. Twist the excess paper at the tip to secure the contents. This final touch prevents the material from falling out and aids in lighting the roll. Packing the end also helps in providing a consistent burn rate throughout the smoking session. The twist at the end acts as a safeguard, keeping the contents intact and ready for use.
Whether you're a beginner or looking to refine your technique, following these fundamental steps will help you achieve a satisfying and well-rolled smoking experience. Remember, the quality of your roll can greatly enhance your smoking session, making the effort to learn this skill well worth it.
Tips for Distributing Fill Evenly
Avoid over-packing or uneven distribution, as this can lead to issues with burning. Gently tap down the contents to ensure they are settled but not too compressed. A uniform distribution helps in rolling the joint neatly and ensures an even burn.
Best Practices for Beginner Rollers
Mastering the Classic Hand Roll Technique
It involves delicacy, precision, and a bit of patience. Start by evenly spreading your ground material along the crease of the paper, leaving enough space at the ends to prevent spillage. Gently rolling the paper back and forth between your fingers helps to shape the contents into a cylinder. It's important to exert consistent pressure and not move too quickly. How to roll joints more evenly with experience.
Avoiding Common Rolling Mistakes
When rolling your joints, several common mistakes can adversely affect the smoking experience. One of the most frequent errors is overfilling the paper. While it might seem beneficial to maximize the amount of smoking material, this often makes the joint difficult to close and can lead to an uneven burn, as the overly stuffed joint creates uneven air pockets that affect how the joint burns. Ideally, the amount of material should allow the paper to wrap around smoothly without forcing the edges apart.
Another common problem is the application of too much saliva when sealing the joint. Excessive moisture can weaken the paper, leading to tears or compromising the joint's structural integrity. It's important to moisten the adhesive strip of the paper lightly and evenly, ensuring it adheres without saturating the paper. Being mindful of these pitfalls will help you refine your rolling skills.
Tips for Rolling Joints
A joint that's rolled too tightly might be hard to smoke due to restricted airflow, while one that's too loose may burn too quickly and unevenly. The goal is to find a balance. After placing the fill, gently but firmly roll the paper back and forth to evenly distribute and compact the contents. When rolling it up, apply steady pressure to ensure the joint is neither too loose nor too tight.
Ensuring an Even Burn in Your Roll
To ensure your joint burns evenly, pay attention to how evenly you distribute the fill and how consistently you roll it. Air pockets and loose spots can cause a joint to burn unevenly, often referred to as “canoeing.” If you notice your roll has uneven areas, you can gently adjust the contents with a poker before sealing. A well-rolled joint should have a uniform shape and feel consistent along its length.
Exploring Different Rolling Methods
Using Rolling Machines
Rolling machines are an excellent tool for both novice and experienced smokers who seek consistency and convenience in their rolling process. These devices are specifically designed to mitigate the common issues associated with manual rolling. A typical
rolling machine consists of two cylindrical rollers set parallel to each other, attached to a frame. The machine includes a flexible fabric or plastic sleeve that holds the rolling paper in place. Users place their ground smoking material on the paper within this sleeve. When the rollers are moved, usually by a simple hand adjustment, they evenly distribute and tightly pack the material into the paper, rolling it into a perfect cylinder. This automatic method significantly reduces the chances of human error and ensures a uniformly shaped joint every time, ideal for those who value consistency in their smoking experience.
Using a rolling machine eliminates the learning curve associated with hand rolling. It provides a quick, reliable alternative that produces evenly packed and smoothly rolled joints in seconds. Additionally, for individuals who roll multiple joints frequently, whether for social occasions or personal use, a
rolling machine can save a significant amount of time and effort.
Alternative Techniques for Different Skill Levels
As you gain confidence in your rolling abilities, exploring alternative techniques can be both fun and rewarding. Techniques such as the 'backroll' method, where the paper is rolled upside down and the excess paper is torn off, can offer a more advanced challenge. Some rollers also experiment with different shapes and sizes, moving beyond the classic cylindrical form. Each technique requires different levels of skill and offers a unique smoking experience.
Pros and Cons of Various Rolling Methods
Hand rolling, while challenging, offers a sense of accomplishment and a customizable rolling experience. Rolling machines provide ease and uniformity but may limit the size and shape of your joint. Alternative methods can enhance your rolling repertoire but often require more practice and patience. Understanding these trade-offs helps in choosing a method that best suits your current skill level and desired outcome.
Tailoring Your Rolling Method to Personal Preference
Ultimately, the choice of rolling method should align with your personal preferences and smoking habits. If you value precision and consistency, a rolling machine might be your best bet. If you enjoy the process and the personalized touch of hand rolling, then honing your manual skills is the way to go. As you experiment with different methods, you'll discover what works best for you, whether it's a quick and easy machine roll or the nuanced control of a handcrafted joint.
Advanced Rolling Tips
Tricks for Rolling Unique Shapes and Sizes
Experimenting with unique shapes and sizes in rolling can add a fun and creative dimension to your smoking experience. Once you have mastered the basics of rolling, you can explore these more complex styles. Each style requires a bit of practice and finesse but can be quite rewarding once mastered. Here are some tricks to help you get started:
-
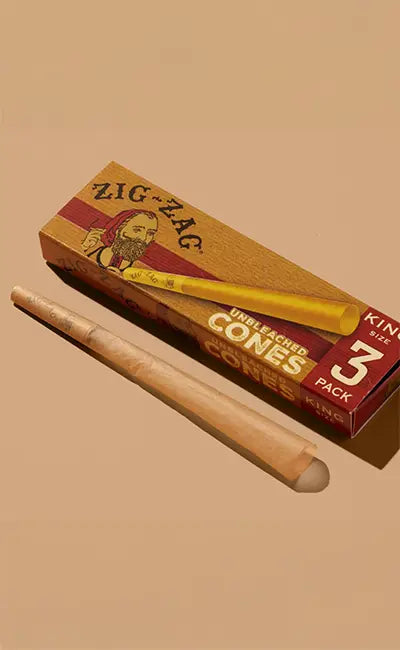
Cone Rolls: Cone rolls are designed to maximize the ease of smoking with a stylish taper. To create a cone roll, start with a wider filter at one end. Place less smoking material near the filter end and gradually increase the amount towards the opposite end. This setup allows the material to burn more slowly at the thicker end, ensuring a longer-lasting session. The challenge lies in achieving a smooth, gradual taper from the filter to the tip, which is crucial for a consistent burn. This style is particularly popular for its sophisticated appearance and functional design that enhances the smoking experience.
-
Diamond Rolls: Diamond rolls are visually striking and provide a unique twist on the traditional cylindrical roll. To achieve this, fold your rolling paper into a diamond shape first. Place your smoking material in the center of the diamond, and then meticulously fold the paper from the corners, rolling it towards the center. This technique requires precise folding and rolling to maintain the diamond shape while ensuring an even burn. The key here is to balance the aesthetic of the roll with functional aspects like airflow and burn rate, making it both a craft and a smoking apparatus.
-
L-Shaped Joints: L-shaped joints offer a novel design that allows for a larger amount of smoking material without the bulk of a traditional large roll. To construct an L-shaped joint, use two rolling papers and attach them so they form an 'L' shape. This unconventional design requires careful balancing and even distribution of the smoking material to maintain the shape during rolling and use. It’s crucial to avoid any weak points that might cause the joint to burn unevenly. This type of joint is not only a conversation starter but also enhances the smoking experience by providing a larger, yet manageable, size.
-
Cross Joints: Cross joints are perfect for those looking to impress their peers with their rolling skills. Start by rolling two joints – one longer and one shorter. Make a hole in the center of the larger joint and insert the smaller one perpendicular to it. Use adhesive strips from spare papers to seal any gaps at the intersection. This design not only looks complex and intriguing but also offers a unique dual-burning smoking experience. Mastery of the cross joint is considered a pinnacle skill among enthusiasts, combining precision and creativity.
Exploring unique shapes and sizes of rolls can be an enjoyable challenge for those looking to expand their best rolling techniques. Remember, the key to success with these advanced rolling methods is patience and practice. With time, you'll be able to impress your friends with your prowess and enjoy a uniquely crafted smoke.
Transitioning from Beginner to Advanced Techniques
Start by mastering the basics, then gradually introduce variations and new methods. Don’t be afraid to make mistakes – each roll is a learning opportunity. Watch tutorials, learn from experienced rollers, and keep experimenting with different styles and methods. On the other hand, creative rolling involves exploring different shapes, sizes, and even incorporating
multiple types of papers for aesthetic effects. Artistic rolling might not always be practical for everyday smoking, but it's a fantastic way to showcase your skills and impress friends during special occasions. As you explore these artistic aspects, remember that the quality of the roll is as important as its appearance.
Additional Skills for Elevating Your Rolling
Grinding the Herb: Best Practices
Proper preparation of your herb is essential for a good roll.
Grinding your herb to the right consistency is key. It should be fine enough to ensure an even burn but not so powdery that it restricts airflow. Investing in a quality grinder can make a significant difference. A uniform grind allows for even distribution within the paper and contributes to the overall ease of rolling and quality of the smoking experience.
Maintaining Consistency in Your Rolls
Practice is essential to achieve this consistency. Pay attention to the amount of herb you use, the distribution of the fill, and the tightness of your roll. Developing a routine in your rolling process can help maintain this consistency. It's also beneficial to be mindful of the moisture content in your herb, as this can greatly affect the rolling process and outcome.
Rolling is an art that improves with practice and experimentation. Don't be discouraged by initial failures; each attempt is a step towards mastery. Experiment with different types of papers, techniques, and shapes to discover what works best for you. Remember, rolling is not just a mechanical process but an opportunity to express creativity and personal preference. Stay curious and open to trying new methods, and most importantly, enjoy the process. With time and practice, you'll develop the finesse and skill of an experienced roller.


